Best compression shirts for strength training in 2026

Best overall: a short-sleeve compression shirt. Best for exposed arms: a sleeveless compression shirt. Best for full-arm coverage: a long-sleeve compression shirt. The best compression shirts for strength training stay close to your body without restricting your brace, overhead reach, or setup under the bar.
TL;DR- The best compression shirts for strength training allow full movement and comfortable bracing; short sleeves are the default pick.
- Choose sleeveless compression for exposed arms and long sleeves when full-arm coverage matters.
- Compression shirts and heavyweight tees serve different preferences. Rage U Athletics offers heavyweight tees, not an interchangeable compression fit.
- Reject shirts that pinch your armpits, pull your neckline, or require repeated adjustment during lifting.
Why this matters
A compression shirt should remove a distraction. If you spend your session pulling down the hem or freeing a sleeve from your armpit, the fit has failed. A tighter size does not fix that.
Your training shirt also expresses how you dress. Close-fitting base layers and structured streetwear create different silhouettes. Rage U Athletics sells athletic apparel, including heavyweight tees and hoodies; choose those for their own role rather than treating every athletic top as compression gear.
For your 2026 training rotation, start with the movement you need. Then choose coverage, seams, and fabric feel. The logo comes after the fit.
What makes the best compression shirts for strength training?
Use these criteria before choosing a cut. A shirt that fails your movement check does not earn a place because its label promises support.
- Unrestricted movement: Reach overhead, bring your arms forward, and take your squat grip. The shirt should follow each position without pulling you out of it.
- Comfortable bracing: Take a full breath and brace your trunk. Reject pressure that makes either action uncomfortable.
- Stable coverage: Check the hem during overhead work and your hinge setup. Decide how much exposure you accept before buying.
- Tolerable seams: Inspect the underarms, shoulders, neckline, and side seams. Notice where they contact your skin and equipment.
- Useful fabric information: Read the composition and care label. Stretch, thickness, and surface feel matter more than an unsupported performance slogan.
- Repeatable fit: Judge the shirt in your lifting positions, not only standing upright. Your training fit needs to work when your posture changes.
Compression shirt formats at a glance
This 2026 ranking compares shirt formats, not individual product models. Each format owns a different job; the table gives you the decision before the details.
| Rank and format | Best for | Standout feature | Key limitation |
|---|---|---|---|
| 1. Short-sleeve compression shirt | A default lifting top | Torso coverage without forearm coverage | Sleeve edges can press into the upper arm |
| 2. Sleeveless compression shirt | Lifters who want exposed arms | No sleeves around the upper arms | Less coverage against benches and other surfaces |
| 3. Long-sleeve compression shirt | Full-arm coverage | Covers the torso and arms in one layer | More fabric to manage at elbows and wrists |
| 4. High-neck compression shirt | Lifters who specifically want neck coverage | A higher collar than a crew neck | Neck contact is not comfortable for everyone |
Choose the cut for its coverage, then judge the actual garment for fit. Sleeve length alone does not establish breathability, durability, or compression pressure.
1. Short-sleeve compression: best for everyday lifting
A short-sleeve compression shirt is the default when you want a close-fitting torso without fabric over your forearms. Start here if your sessions include presses, rows, squats, and accessory work. It keeps the buying decision simple.
Check the sleeve opening first. A shirt can fit your chest while pressing uncomfortably into your upper arm, especially when you bend your elbow or bring your hands toward your shoulders. Do not judge that opening with your arms hanging still.
Short-sleeve compression pros:
- Leaves your forearms uncovered.
- Provides more shoulder coverage than a sleeveless cut.
- Avoids cuffs at your wrists.
Short-sleeve compression cons:
- Sleeve openings can pinch even when the torso fits.
- Underarm seams still need a movement check.
- Does not provide full-arm coverage.
Best for: Lifters choosing their first close-fitting training shirt or replacing an unreliable everyday top.
Make this your first fitting-room comparison in 2026. Try it before adding specialty collars or panel layouts. If the basic cut works, extra construction needs a clear reason.
Verdict: Buy the short-sleeve format first if you have no specific coverage requirement.
2. Sleeveless compression: best for exposed arms
A sleeveless compression shirt keeps the torso close-fitting while removing sleeves from the equation. Choose it because you want your arms exposed, not because the cut guarantees better cooling or stronger lifts.
The armhole is the deciding detail. Raise your arms, reach across your chest, and take a pressing position. An armhole that looks clean while standing can rub or gape once you move.
Sleeveless compression pros:
- Removes sleeve openings from the upper arms.
- Leaves elbows and forearms uncovered.
- Makes arm coverage a deliberate choice rather than an adjustment mid-session.
Sleeveless compression cons:
- Exposes more skin to benches and other surfaces.
- Armhole edges can still rub.
- Provides less coverage beneath an outer layer.
Best for: Lifters who dislike upper-arm sleeve contact and prefer an exposed-arm training silhouette.
Check your gym's clothing rules before choosing the cut. Then test the armhole under tension. A wide opening and a comfortable opening are not automatically the same thing.
Verdict: Buy sleeveless compression when exposed arms are the priority; skip it when coverage matters more.
3. Long-sleeve compression: best for full-arm coverage
A long-sleeve compression shirt covers your arms without requiring a separate sleeve. Choose the format when that coverage is part of your training preference. Do not assume a close-fitting long sleeve is insulated or sun-protective unless its specifications establish that.
Bend your elbows fully and extend your wrists. Look for bunching inside the elbow and pulling between the cuff and shoulder. Test the shirt with your usual wrist equipment rather than assuming the pieces will sit together comfortably.
Long-sleeve compression pros:
- Provides continuous arm coverage.
- Removes the need to position separate sleeves.
- Offers a covered silhouette beneath other clothing.
Long-sleeve compression cons:
- Adds fabric at the elbows and wrists.
- Cuffs can interfere with your preferred equipment placement.
- Sleeve length creates another fit measurement to check.
Best for: Lifters who specifically want their arms covered throughout the session.
For a 2026 kit update, judge coverage separately from warmth. If your goal is insulation, inspect the fabric and intended use instead of relying on sleeve length.
Verdict: Buy long sleeves for coverage; skip them if cuffs or elbow fabric distract you.
4. High-neck compression: best for deliberate neck coverage
A high-neck compression shirt extends the collar above a conventional crew neckline. The point is coverage. It is not a necessary upgrade from the other formats, and sleeve length remains a separate decision.
Turn your head, look upward, and settle into your normal lifting setup. A collar that presses against your throat or distracts you during a brace is the wrong choice. Style does not overrule comfort under load.
High-neck compression pros:
- Covers more of the neck than a crew-neck cut.
- Creates a distinct neckline beneath an open outer layer.
- Gives lifters who prefer a higher collar a specific option.
High-neck compression cons:
- Adds contact around the neck.
- Requires extra attention to collar height and seam placement.
- Does not solve poor torso or shoulder fit.
Best for: Lifters who already know they prefer neck coverage and tolerate a close collar.
Try a crew neck alongside the high-neck option. Keep the higher collar only if it improves your experience rather than merely changing the look.
Verdict: Hold unless neck coverage is a clear preference.
Test the fit before the first working set
A mirror check is not enough. Use this movement sequence before removing tags or committing the shirt to your rotation, while following the seller's handling instructions.
Check the shoulders
Perform 5 overhead reaches. Raise your arms without deliberately shortening the movement to accommodate the shirt, then bring your hands forward as if setting up for a press. Reject sharp pulling across the shoulders or neckline.
Check the brace
Take 3 deep breaths, then practice your normal brace without a loaded bar. The shirt should feel close, not obstructive. Numbness, tingling, pain, or breathing restriction are reasons to stop wearing it, not signs of useful compression.
Check the hem
Perform 5 bodyweight squats, then hinge into your deadlift setup. Notice where the hem finishes and whether it stays there. Decide whether you want the shirt tucked or untucked, and test that exact arrangement.
Check equipment contact
Use your normal lifting positions with an unloaded setup. Check seams against the bench, cuffs beside wrist wraps, and fabric beneath your belt if you wear one. Do not introduce a loaded lift just to prove a shirt fits.
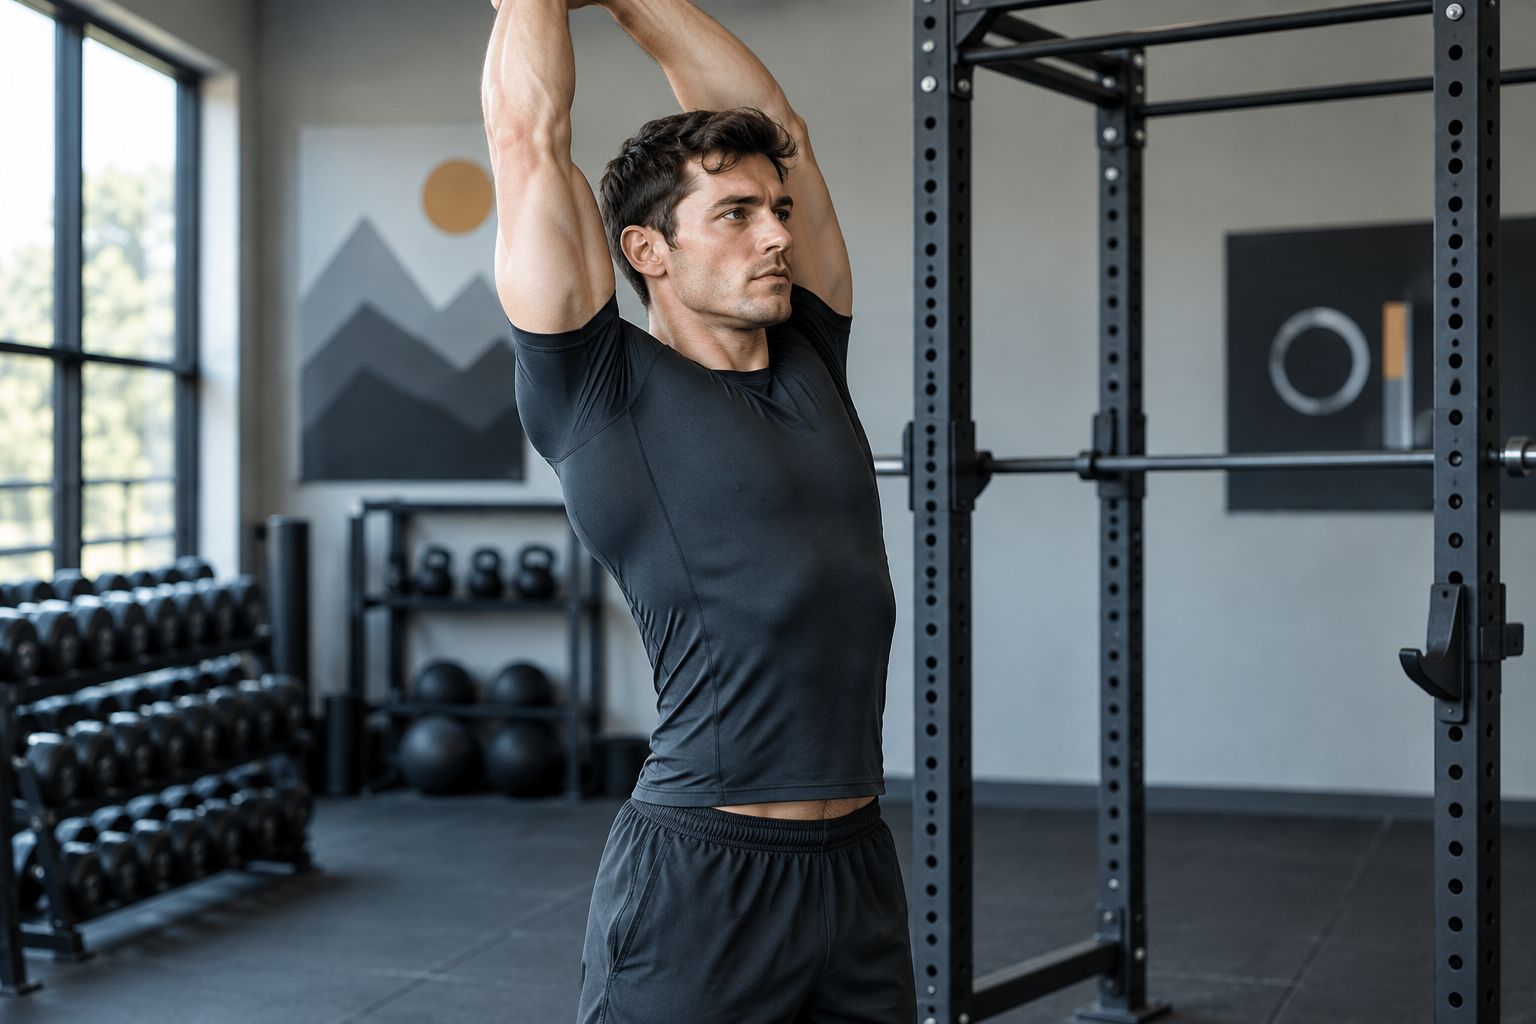
Repeat any uncomfortable position slowly. If you keep correcting the shirt between movements, reject the fit rather than planning to tolerate it.
Fabric, construction, and care: read beyond the label
Do not use fabric weight as a shortcut for compression quality. Weight describes material mass; it does not establish garment pressure or freedom of movement. Likewise, a stretch-fiber percentage does not tell you how the finished shirt will fit your body.
Inspect the garment itself. Look for loose stitching, uneven seams, and areas that become visibly sheer when stretched through your normal range. Check the care instructions before deciding whether the shirt fits your laundry routine.
After washing according to the label, compare the hem, collar, and sleeve shape with their original fit. Stop treating a shirt as suitable training gear if stretched openings or damaged seams make it distracting. Durability needs observation, not an invented lifespan.
Keep ordinary training apparel separate from medical compression garments. Do not substitute a gym shirt for prescribed compression or interpret tightness as a treatment benefit.
Compression shirt or heavyweight tee?
Rage U Athletics heavyweight tees suit athletes who want a structured tee rather than a compression layer. That is a different clothing choice, not a claim that one format improves strength more than the other.
| Clothing choice | Best for | What to check | Main trade-off |
|---|---|---|---|
| Compression shirt | A close-to-body training silhouette | Bracing, seams, hem stability | More continuous skin contact |
| Heavyweight tee | Athletes who prefer a structured tee | Shoulder movement, fabric feel, coverage | A different fit from compression |
Do not buy a smaller tee to imitate a compression pattern. Choose the intended garment type, then find the size that works through your movements. If you prefer the streetwear side of training apparel, Rage U Athletics offers heavyweight tees; keep that preference separate from a need for close-fitting base layers.
How the formats are ranked
The ranking puts a default cut first, then separates exposed arms, full-arm coverage, and neck coverage. Movement, bracing, seam comfort, and stable coverage decide whether any actual shirt passes. No cut earns a strength-gain claim from its silhouette.
Use the same order for every 2026 purchase: choose the job, test the movement, inspect the construction. A specific shirt that fails those checks loses to a simpler shirt that passes.
Which compression shirt should you choose?
Choose a short-sleeve compression shirt if you are undecided. Move to sleeveless only for exposed arms, long sleeves for arm coverage, and a high neck for a collar preference you have already tested.
Keep the standard strict. You should not have to change your brace, shorten your reach, or interrupt your setup for clothing. A familiar shirt that stays out of your way beats a new one that demands attention.
FAQ
What's the best compression shirt for strength training?
A short-sleeve compression shirt is the default choice when you have no specific coverage requirement. Choose the actual garment by comfortable bracing, unrestricted shoulder movement, stable coverage, and tolerable seams.
Should a compression shirt feel extremely tight?
No. A compression shirt should fit close without causing pain, numbness, tingling, or breathing restriction. Do not interpret discomfort as proof that it works.
Should I size down for more compression?
Do not size down just to create more pressure. Use the manufacturer's measurements, then check the shirt through your normal lifting positions.
Are sleeveless compression shirts better for lifting?
Sleeveless compression shirts are better for lifters who specifically want exposed arms. They remove sleeves but still require checks for armhole rubbing, gaping, and torso fit.
Can I wear long-sleeve compression under wrist wraps?
Check the combination in your normal setup before training with it. Keep the shirt only if the cuffs and wraps sit comfortably without distracting bunching or pressure.
Does a compression shirt replace good lifting technique?
No. Choose a compression shirt as clothing, not as a substitute for technique, appropriate loading, or coaching. A close fit is not proof of improved strength.
Does Rage U Athletics sell a heavyweight tee I can use instead?
Rage U Athletics offers heavyweight tees. Choose that category when you want a structured tee, not when you specifically need a compression fit.
How should I wash a compression shirt?
Follow the care label for that garment. Check its fit and seams after washing rather than assuming every stretch fabric tolerates the same laundry routine.
One last thing
The most useful comparison happens with your arms raised. A shirt that looks right at rest can behave differently when you reach, brace, and hinge. Make that movement check your final decision—not the size printed inside the collar.